


Bill Kielb
-
Posts
5,146 -
Joined
-
Last visited
Content Type
Profiles
Forums
Gallery
Everything posted by Bill Kielb
-

Pieces warping/getting stuck to bats
Bill Kielb replied to Miriam Ash's topic in Studio Operations and Making Work
I would encourage you to try this. Remove as much water from your pot with rib and sponge as you can,, trim any excess from the bottom you can. Take a heat gun dry the pot evenly slightly more (30 seconds!) while the wheel spins. Then undercut the foot with your needle tool about 1/4” and wire off cleanly dry your hands, pick up and set your pot on a cheap paper towel on top of your ware board or another batt. I can’t tell you how many new folks this has helped. From developing confidence to lift to learning to throw dyer or rib dryer and just start picking their pots up without the heat gun ............ to evenly drying their stuff once removed and lightly covered. I find water and excess clay all an early enemy to things happening more easily for beginners. Ask your teacher to show you how to pre trim the bottom wall thickness a bit more evenly before removal. Until you become proficient at throwing, often the bases of your pots will be much thicker than they need be. Removing this helps drying and makes final trimming much easier. -
Geeks only - Raspberry PI controlled kiln
Bill Kielb replied to jbruce's topic in Equipment Use and Repair
Jbruce was last here in 2019, maybe dm him. -
Pieces warping/getting stuck to bats
Bill Kielb replied to Miriam Ash's topic in Studio Operations and Making Work
We started to show folks this and for many it has helped: throw your piece, dry it off with your rib as much as practical. Place your needle tool under about a 1/4” and prescore a nice line under the foot, no more than 1/4”. Very neat line! Now wire off nicely. Get a paper towel and put it on your bat or ware board. Pick up your pot with dry fingers as gently as you know how and set it on the paper towel on the board or batt. Cover loosely and let it dry to leather hard. The bottom will dry as fast as the sides because the water will wick out the paper towel. The bottom will not stick to the batt or ware board because of the towel. If you are leaving these on the batt to dry a bit more, the score line from the needle tool under the foot will help guide your wire later and it will be much easier to remove when you do. For really new folks we will let them heatgun stuff just enough to firm it up so they can pick it off the wheel until they become better throwing with less water. Generally the heatgun dependency thing becomes annoying and they learn to throw dryer and lift with more confidence. Hope that helps. -
Not sure what is the issue here but it is common to cut the shaft to size. Potentiometers with long shafts are often used to accommodate varying backsets.
-
There are actually more with Advancer being an early popular bonded nitride, Cryston (Kilnshelf.com) , Resco, Axner / Laguna (Likely Ashine - China) and others sell knock off for about 1/2 to 2/3 the price. I have personally used the knock offs (Axner) with very good results but they are not nearly as nice as true ram pressed premium versions.
-
Olympic 2327 Kiln - Corroded connector replacement
Bill Kielb replied to Andere's topic in Equipment Use and Repair
Crimp connectors are great, have a good history in aviation ...... properly done of course. Folks fixing kilns don’t often have ratchet style locking crimpers so I agree whole heartedly, most kiln crimps are not great. -
Olympic 2327 Kiln - Corroded connector replacement
Bill Kielb replied to Andere's topic in Equipment Use and Repair
I would replace them all. Likely elements need replacement anyway. With your new elements you might change to the barrel style mechanical connection or an alternate to the crimped to avoid the issue in the future. -
Replacing Bearings on an OLD Lockerbie Wheel
Bill Kielb replied to AveryO's topic in Equipment Use and Repair
Laguna / Axner still sell these and have a generic maintenance document on them you might find helpful. https://www.axner.com/pdf/laguna/Lockerbie_Care_Model_K_and_EK.pdf Having looked at a number of these pictures and the replacement parts I believe the wheel head needs to be fastened to the shaft and the shaft fastened to the kick wheel for this to work without slipping. So first thing I would try is removing all set screws from BOTH collars above and below the top bearing assembly and try removing the wheel head. I believe you might find the wheel is removable and has a smaller permanent shaft of its own that fits inside the main shaft and is retained by the collars. If this guess is all true then loosening this wheel head connection by twisting is likely easiest rather than just pulling up on the wheel head. I would clamp the outer shaft with a pipe wrench or hold onto /step on the kick wheel to prevent it from turning and turn the wheel head back and forth by hand to try and loosen it. If that frees the wheel head then just work it up and out by turning / wiggling while lifting. Last gasp would be to extract the entire shaft from the top bearing by removing the bottom bolt and wiggling to remove the entire shaft from the bottom bearing on up through the top bearing. The new concrete replacement wheels appear to have this bottom collar cast in place through the concrete wheel so the shaft should come out of it, albeit likely with some difficulty. Axner / Laguna seem to have all the parts available https://www.axner.com/lockerbie-kick-wheels.aspx -
Cress B-23-H to cone 018?
Bill Kielb replied to Tumbleweed Pottery's topic in Equipment Use and Repair
This is always an idea I struggle with but should absolutely work and work fairly easily. New wires, maybe switches, service cord etc... attention to detail so everything is to or above rating electrically for sure and the most important part I strongly suggest, relabeling the kiln very permanently with the new wattage and amperage in the event you ever sell this kiln or even give it away. -
Cress B-23-H to cone 018?
Bill Kielb replied to Tumbleweed Pottery's topic in Equipment Use and Repair
The dial on the bottom appears to be the sitter timer which is set at the beginning of the firing a bit longer than the firing should take as a redundant way to turn off the kiln in the event the sitter doesn’t. It is usually marked in hours and will count down to zero where it turns everything off. The sitter directly above is the device that turns the kiln off when the desired cone is reached and the single knob on top turns your kiln power from low through high. Cress has a general manual on their site for these early models https://3fs7rd1xi6sy2zofjv3g0a0q-wpengine.netdna-ssl.com/wp-content/uploads/BASIC-KILN-MANUAL-FOR-ABC-KILNS-1.pdf This kiln also appears to have an extension ring on top, so it may be rated only to cone 6 which generally means it is most suitable for lowfire glaze and bisque work ....... cone 04. Google firing a manual kiln, basically you will need to learn how to set the timer, arm the sitter and then manually turn up the power on some schedule. If you understand the why, and how long of bisque and glaze firings and know these going in it will remove much of the mystery about how fast should I turn up the power. google bisque and glaze firing speeds probably gets a lot of good written material on the subject. The basic information is in the manual above along with a suggested firing schedule. -
Help with using a Duncan Automatic Teacher-Plus Kiln
Bill Kielb replied to Nataniajoy24's topic in Equipment Use and Repair
Trial and error for sure. Time is key for some clays, not all clay bodies need the same amount of time actually. So for difficult bodies usually dark and containing iron, sulphur, etc.... often a longer cycle is needed to complete the burnout. Many potters figure this out for their clay by experience. 200 degrees per hour is a typical rate that gets this in the 10 hour range and is reasonably slow while greenware goes through some pretty significant changes. I think if I had the teacher plus I would relabel it from 1-10 instead of overglaze , ceramic etc..... and just learn from repetition what worked best reducing or increasing firings by the numbers as necessary which you are doing at this point, The only thought is adding time before your final segment is probably easiest and most effective at keeping the wares at a higher temp for a longer period for more complete burnout without a bunch of thinking. A pyrometer definitely would remove the mystery for you and is always a good thing to have. Most kilns will only go about 100 degrees per hour at the very top so this works out pretty good when elements are new. Pyrometers are great and mostly serve to just tell you where you are at. Calculating rate in degrees per hour is often tedious for many as what time frame is a fair representation, or do I simply wait an hour? For gas kilns the quickest we will go is a 5 minute sample, with 15 minutes being more closely representative of the hourly rate. Many automatic controls will give roughly a rate within the last 22 minutes. -
Accidentally started manual kiln on high not low
Bill Kielb replied to Emiliek's topic in Studio Operations and Making Work
As a glaze firing, not much potential water to dry out so I would have done the same as you. Most of my glazes fire fine at 5 hrs, so I might have left it on high actually. I think you made a reasonable choice. If it was a bisque fire I might have been inclined to switch it to low for a bit and get it back on schedule knowing if anything was wet, I might have already damaged those wares. Bisque firings run about half the speed of glaze to give enough time at temperature to burn out all organics effectively so that is why I potentially would revert back to slow. -
Studio Tips: glazing, underglaze, and in-glaze
Bill Kielb replied to Pres's topic in Studio Operations and Making Work
Hmm, sorry, didn’t mean to imply anything other than very fine brushwork is possible as well as depth and precision. Just a possibility, not meant as an assessment in any way. Just meant as some more ideas that may or may not interest you. Your conclusion “any suggestions welcome” was taken as such. sorry again.- 24 replies
-
- 1
-

-
- studio tips
- glaze
- (and 3 more)
-
Bonded nitride shelves are highly glaze resistant and generally do not benefit from kiln wash. Some porcelains may flux and pluck however so folks will often kiln wash only those shelves to solve the plucking issue if they use a claybody that has this issue.
-
Replacing potentiometer inside Brent pedal
Bill Kielb replied to Brandon B's topic in Equipment Use and Repair
So the 1 megohm pot was the winner! I think if one searches the mouser site and looks through the data sheet and physical properties a close match might be available. -
Probably a function of ECM motor use in the last five years or so. Easy feature, soft start, greater efficiency motor. It appears to be a base feature from what I read, maybe not. If they moved to ECM motors it’s an easy feature to add and the auto speed makes sense.
-
Current Peter plugger website for the vpm 30. Maybe a current feature and yours at least auto senses?
-
According to the features published it can automatically and also has a speed control. “Intellectual Mixing Technology: Real-time monitoring of clay consistency can be accomplished while mixing. Similar to an automatic transmission, the Pugger-Mixer can automatically speed up or slow down based on the hardness of the clay being processed. The operator can also control the speed by controlling the variable speed knob.”
-
I would assume an industrial one. Prosumer, add water, mix longer?

-
Help with using a Duncan Automatic Teacher-Plus Kiln
Bill Kielb replied to Nataniajoy24's topic in Equipment Use and Repair
Definitely learn your kiln. Your manual is newer than the manual posted above. For the common issue of firings ending too quickly I suspect most end up wishing they would have simply printed power level numbers from zero to 10 instead of what they did. It really comes down to a reasonable firing speed of approximately 200 f degrees per hour for bisque and 400-500f degrees per hour firing speed for glaze with the final segment of 200 degrees or so being done at about 100 f degrees per hour. Today’s automatic controls know this and have default schedules built in. They are truly automatic. -
Help with using a Duncan Automatic Teacher-Plus Kiln
Bill Kielb replied to Nataniajoy24's topic in Equipment Use and Repair
Read carefully through the threads above. If you bisque fire to cone 7 your ware will be rock hard and you will not be able to glaze it very easily. Page 11 explains that when you use cones to monitor how the firing went (witness cones) to use the three cone method. Guide, firing, guard. So if one was glaze firing to cone 6 they would use cones 5,6,7. The guide is 5, the guard is 7 and the firing cone is 6. Just for reference this kiln just isn’t really automatic by today’s standards. For most firings you will need to turn the infinite switch(s) from a lower setting to a higher setting during the firing to provide enough time to bisque or glaze fire. I would suggest while you have time to wait for your kiln parts or cones google and read the what’s and why’s of firing schedules. For cone 6 glaze firings- cone 6 bar for the sitter and cone 5,6,7 witness cones. Firing should take let’s say approximately 7-10 hours. For cone 04 bisque - cone 04 bar for the sitter and cone 05,04,03 witness cones. Firing should take let’s say approximately 9-12 hours to burn out all the organics. Remember for cones that start with zero (0) they are a bit backwards as cone 03 is hotter than cone 04. So a bit backwards from what is intuitive. The issue most folks complain about with these kilns is generally they fire too fast and the resolution is often to have them learn how to turn things up gradually to get an acceptable firing speed. -
Studio Tips: glazing, underglaze, and in-glaze
Bill Kielb replied to Pres's topic in Studio Operations and Making Work
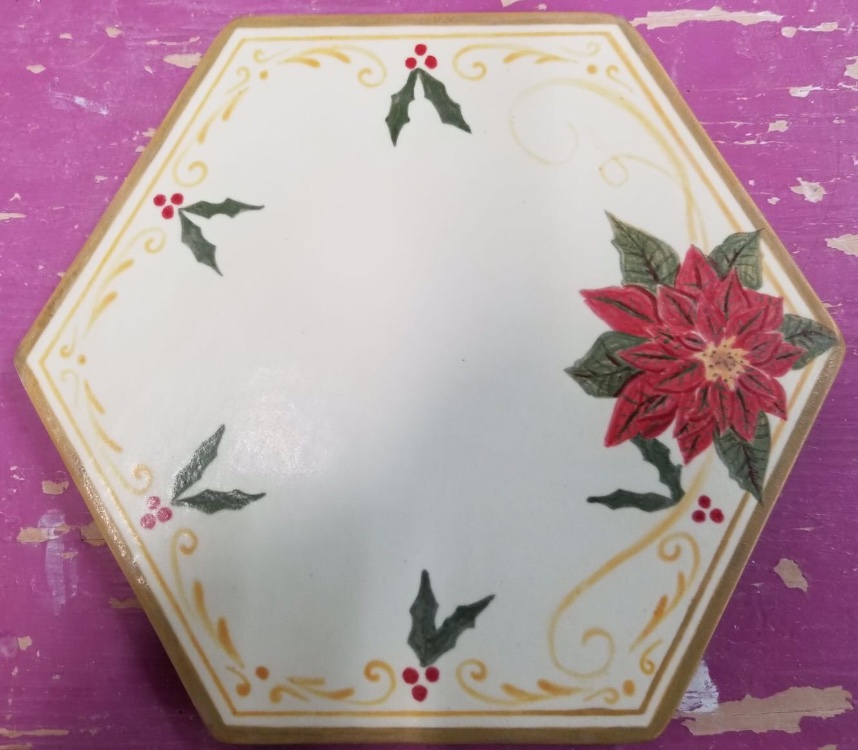
You can also paint, very finely might I add. Got tired of using the squeeze bottles unless absolutely necessary. With practice, most anything can be done. Adding China paint later gives more opportunities to accent as well


-
Slower speed, better mixing, less bypass, likely more uniform moisture content. Wonder if he even has to mix longer. Hmm, might be a cool lesson here as aging would tend to even out the moisture content as well. Maybe we really don’t need to hope for foul smelling clay? Maybe I can take that warning sign down that says no bad mold spores allowed! Just some food for thought.
-
Help with using a Duncan Automatic Teacher-Plus Kiln
Bill Kielb replied to Nataniajoy24's topic in Equipment Use and Repair
I don’t think I would as the sitter can be adjusted to act correctly. Now for balancing the kiln, next firing, maybe the bottom is left slightly lower than the top, say one digit. It’s not uncommon for the tops of electric kilns to run cooler because of the heat loss through the lid. As for speeding up, just modify your schedule slightly and turn up a little quicker as you go. Seven to ten hours is usually fine for glaze. If you can balance top and bottom a bit more this way, easy to adjust your sitter ever so slightly to tweak it back on cone IMO. -
I think You likely could recreate this effect with ordinary underglazes. Glass and ceramics just aren’t compatible IMO.


