


karenkstudio
-
Posts
142 -
Joined
-
Last visited
Content Type
Profiles
Forums
Gallery
Everything posted by karenkstudio
-
news.artnet.com/market/jeff-koons-balloon-dog-shattered-2258472 and someone is interested in buying the shards!
-
 I fire flat tile pieces in a variety of sizes. Before loading each shelf, I sprinkle dry kiln wash on each shelf which helps the flat pieces slide on the shelf as the clay shrinks during firing. I seldom have cracks in my bisque pieces, and where I place it on the shelf makes no difference.
 -
Bro saved me the expense and mistake if ordering a new switch.
-
Last time I wanted to fire my large electric kiln 2 sets of elements would not heat when turned to high. I have a paragon kiln with the "setter-timer" wired to the set of switches. Fortunately, my brother is a retired electrician and brought his testing equipment, at my request, when he visited. He has never worked on a kiln. After some initial testing, and figuring out how all the wiring was configured, he removed the cover on the "setter-timer" box to examine those connections. Upon close examination, he noticed a dead SPIDER blocking the connection to the 2 sets of elements that would not work. He blew the dead spider out, reassembled everything and when we turned it on everything worked. He said it isn't unusual for insects to cause electrical problems.
-
I know this topic has been discussed, however I came across information on an art center's web site which list fees for firing. This might serve as a guide. Loaded and Fired by Staff Loaded and Fired by the Artist Low Fire Mid-Range Low Fire Mid Range Large Oval Kiln $80 $100 $40 $60 Medium Kiln $60 $80 $30 $40 Small Kiln $40 $60 $20 $30 Test Kiln $15 $20 $10 $15 For kilns loaded and fired by staff the turnaround time is usually within two weeks. For kilns loaded and fired by the artist themselves they must first pass a skills check. If you have fired many times before, this is just a brief conversation between you and our Ceramics Center Manager. If you have only fired a few times or have never fired an electric kiln, our Ceramics Studio Manager will go through the firing process with you beforehand - this cost $35 for the 1 hour lesson. Kilns can only be loaded and unloaded during open studio hours or LUX business hours.
-

From the album: experimenting
Horse hair Raku -
alternate firing techniques
-
-
I've searched for examples of 3-D printed ceramics online. Many were delicate, aesthetically pleasing extruded coil pieces arranged in every configuration the computer and printer will allow, and I think that's where 3-D printed ceramics is right now. I'm the type of person who likes leave a mark by swiping my finger across a frosted cake. Perhaps some potters will begin to manually alter these as they have done with wheel thrown pieces. I could never build coil pieces like these by hand.
-
What’s on your workbench?
karenkstudio replied to Pres's topic in Aesthetic Approaches and Philosophy
another battery votive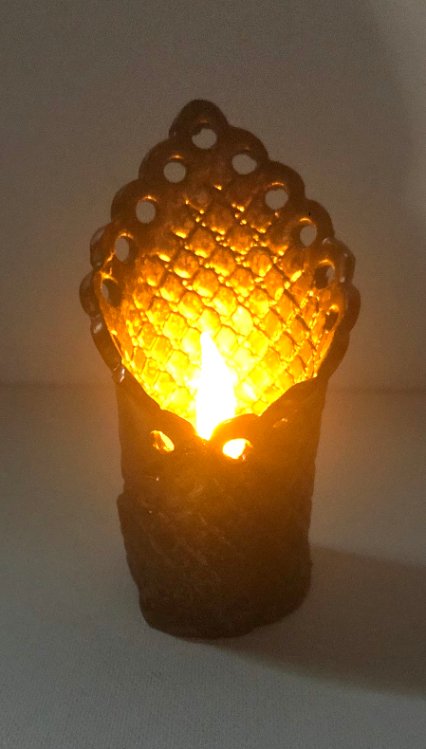
-
The firing "tree" I use for my wood fired raku is made of steel mesh. It was bent into a triangle shape and wired to the base. I've used it for at least a a half dozen wood firings. It has warped slightly with use. I like using a "tree" because it allows me to pull all of my little pieces out of the kiln at the same time.
-

Great idea!
I guess my idea of raku involved grabbing pots and placing them in various reduction stuff but the tree is a really practical solution to firing little bits not going down that path. Love it and your bits
-
-
What’s on your workbench?
karenkstudio replied to Pres's topic in Aesthetic Approaches and Philosophy
I fired my top loading wood fire raku kiln that I made earlier this spring. Plan to experiment with more small pieces this summer.
-
 This was a Post that appeared on my Facebook page. I loved it. and have to credit Fairbanks Pottery Studio for the post.
 -
-
What’s on your workbench?
karenkstudio replied to Pres's topic in Aesthetic Approaches and Philosophy
Thanks Min. -
What’s on your workbench?
karenkstudio replied to Pres's topic in Aesthetic Approaches and Philosophy
Min, Let me know how the syringes work. I don't have any to experiment with. I have tried this with glue sticks also but didn't like the line impressions left on every beads because of the way the inside of the glue stick tubes were made. -
What’s on your workbench?
karenkstudio replied to Pres's topic in Aesthetic Approaches and Philosophy
To make the "bead popper", 1. screw the "plunger" completely out of the chap stick cylinder 2. Turn the plunger over and force it back into the tube while turning the knob at the bottom. If you line it up with the screw at the center, this will allow you to draw the "plunger" back down into the tube. 3. Screw the little plunger back far enough so you see the top of that center screw. Then take a sharp xacto knife and cut off the extra part of the tube so the plunger is even with the top part of the screw and the tube. 4. When using, start by spraying a little Pam inside the tube with the plunger retracted in the tube, cut the small beads from a slab of clay and push the bead out by screwing the plunger to the top of the tube. Note: I smooth the top edge of the bead when it's pushed just beyond the top edge of the tube. The bottom edge is finished when on the straw (pictured in my original post.) When making the larger beads, retract the plunger and stuff clay in the tube making sure you keep the screw centered as you fill the tub with clay. Hope this helps. -
What’s on your workbench?
karenkstudio replied to Pres's topic in Aesthetic Approaches and Philosophy
Made a "bead popper" from an empty Chap Stick tube. Automatically centers the hole in the bead..JPG.81da12fe1fde7c4defa1fdaadce12fc9.JPG)
-
What’s on your workbench?
karenkstudio replied to Pres's topic in Aesthetic Approaches and Philosophy
finishing a few pieces from a raku firing
-
found the picture of the nova kiln.

-
I posted the picture of the NOVA kiln. There is no way to gradually turn up the temperature. It's the type of kiln that is plugged into a regular outlet, and was probably intended for glass fusing and china painting. I only use it reheat pieces for horsehair raku and like the fact that the elements are covered. I use a sight cone system to determine temp. I don't think it would be practical for bisque. I've never glazed anything in this kiln. Mine only cost $25 so I thought it would worth having for some of my experiments. The picture of the kiln is in my gallery.
-

From the album: #1 karenkstudio
-
Raku and experimental firing
-
-
more Raku items
-
-

From the album: #1 karenkstudio
-

From the album: #1 karenkstudio


.JPG.81da12fe1fde7c4defa1fdaadce12fc9.JPG)


