

Pugaboo
-
Posts
1,195 -
Joined
-
Last visited
Content Type
Profiles
Forums
Gallery
Everything posted by Pugaboo
-

From the album: 2014 Featured Artist Pieces
This is a bowl that I ruined as I was putting in the kiln to bisque fire. Originally it had braided handles to match the braid that runs around the top. As I was pulling my hands out I tapped on of the bone try handles with my little finger and it broke off. I removed it from the kiln shaved off the stump and cut off the other handle then decided I did not like it without handles drilled holes to add the beaded handles after it was fired. It is glazed in coyotes celadon line of glazes In Key line, Sedona Sunset and Sapphire. The handles are heavy duty wire with multi colored glass beads. The dish is NOT food safe due to the handles but it is a very pretty display piece.© Terry Buffington
-

From the album: 2014 Featured Artist Pieces
I made this utensil holder using little loafers cone 6 clay. The birds, vines and flowers are appliqués to give a 3 dimensional look to the surface. The design is painted with Amaco LUGs and then glazed in Amaco Zinc Free clear and the inside is Coyotes Rhubarb.© Terry Buffington
-

From the album: 2014 Featured Artist Pieces
This large oval shallow dish or deep tray. The hummingbird and gazebo image is done with a Mason Transfer method from a design of my own. The front of the dish is painted in Amaco White LUG, Then the Mason Transfer is applied, bisque fired and then glazed in Amaco Zinc Free Clear and the back is glazed in Coyote Baby Blue.© Terry Buffington
-

Picnic Party Time Drink Carrier and Tumblers
Pugaboo posted a gallery image in Browse Member Galleries

From the album: 2014 Featured Artist Pieces
The drink carrier and tumbler set is made with Little loafers cone 6 clay. I slab built the carrier and extruded the handle and tumblers. The entire piece was painted with Amaco White Underglaze. The design is a rubber stamp I rolled into the surface to give it a dimensional texture and then I painted it with Amaco Dark Blue underglaze. The piece is glazed in Amaco Zince Free Clear and the bottom of each inside section is glazed in Coyote Cobalt blue. Each glass has a different design to it so at a party everybody will know which glass is theirs.© Terry Buffington
-
- 1
-

-
- little Loafers
- Amaco
- (and 3 more)
-

From the album: 2014 Featured Artist Pieces
This is a large vase that I painted with Amaco LUGs in Bright Yellow and White. I then used the same 2 colors to make underglaze transferred flowers and applied them to both the inside and the outside. I wanted a bright wallpaper kind of feeling. The vase was made with Little Loafers cone 6 and glazed with Amacos Zinc Free Clear.© Terry Buffington
-

From the album: 2014 Featured Artist Pieces
Large pyramid box topped with Red bird for handle. Made with Little Loafers cone 6 clay. Painted with Amaco LUG underglazes. Glazed on the outside with Amaco Zinc Free Clear and insed with Coyote Rainy Day glaze. I wanted a streaky, Misty, worn background for the stark black trees and red birds. The box is actually white, yellow and gray Amaco Lugs for the back ground. I painted each color on then after painting another layer on top of it wiped it back in some areas before applying the final topmost layer which I then wiped back to allow the other layers to show through. The trees are Amaco Black and the Birds Amaco Dark Red.© Terry Buffington
-
Wanted to give an update on this question. I used a Drexel to grind off the rough marks where it looks like something ran down the side of the box. I took these spots down to the same level as the glossy glaze since they were raised. I then applied new glaze to these areas. I used the alumina and wax again on the lid and rim but this time I applied a very light coat and even used a paper towel to wipe any off that had not dried by the time I was finished applying it to the edge. I refired it successfully! The glaze blended in beautifully and no runs! You can't actually tell I had to grind off some and reglaze it. The top didn't stick either GRIN. I fired the other lidded box for the first time as well and doing the alumina and wax like I did worked perfect on it too, no runs, marks or stuck lid! So I think my original problem was just too much wax so that it ran as it heated up and the alumina stuck to the glaze and was fired right into the top layer of it. Thank you everyone for your help. Terry
-
Thanks everyone for your input. I think from what I have been reading that I simply put it on too thick. I over compensated by putting too much on the 2 lips trying to prevent the lid from sticking. What I have done so far is used my Dremel tool to smooth out the boiled looking spots until they are smooth and level with the glaze around them. They were raised and sort of looked like they sitting on top of the glaze to start with. Doing this of course left some dull areas. I finished by scrubbing the whole thing really well and it is now drying. I would like to try and reglaze it just to see what happens, how do I do this? I think to get the new layer of glaze to stick to the old I need to heat the box up and then quickly apply the new layer of glaze; am I right? Since the clay is fully vitrified can I refire the box and lid separately this time around? Do I need to refire both the top and the bottom or just the bottom? Also do I need to reglaze the entire box or just put glaze on the dulls spots? Thanks for your help... I stumped my teacher as well... Oh well if I gotta screw up at least I can do it creatively. Terry
-
You all might remember awhile back I asked about firing a lidded box. I asked about alumina and several people were very helpful in suggesting ways to fire the box with the lid on and not have it stick. Well I think I did something wrong... I mixed 2 teaspoons of alumina with 4 oz of liquid ceramics wax. I then brushed this on the bottom edge of the lid and the top edge of the box including the flange. I let that dry then glazed the box with the lid on and fired it to ^6. Well on a happy note the lid did not stick at all! On a sad note in several spots it almost looks like the wax and alumina mix melted and ran down the side of the box leaving a permanent dull white dusty mark. Boo hoo so what did I do wrong? Did I use too much of it? Should I only apply it to one edge not both? Did I use the wrong kind of wax to mix with the alumina? Can I use something like steel wool to sand as much of this mark off as possible them reglaze and refire it? I'm basically looking at it as a learning experience at this point so am willing to try some different things to see what happens. I have another lidded box that I am not going to glaze fire right away until I feel a bit more confident in its survival or at worst I'll fire the lid and the bottom separate and hope they still fit together afterwards. So any suggestions anyone? Terry
-
Images of some of my first pottery
-
-

From the album: First pottery attempts
© Copyright© terry Buffington
-

From the album: First pottery attempts
© Copyright © Terry Buffington
-

From the album: First pottery attempts
These small 3x4 boxes are what I am using to try out different techniques instead of flat tiles. Just couldn't see wasting all that clay making flat tiles that would serve no purpose once completed. With these boxes I can get a dimensional surface to test on and a box to stick paint brushes and pottery tools in. Even if they turn out ugly they can still be used around my studio.© Copyright © Terry Buffington
-

From the album: First pottery attempts
My final class project. It's a coil vase with a slab rolled holder. I used RIO with a coyote crawl glaze over the top and it turned out really well, better than I expected.© Copyright © Terry Buffington
-

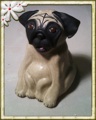
From the album: First pottery attempts
This is my first Pug sculpture finally completed. I am pleased with the way it turned out now just need to be brave enough to start another one!© Copyright © Terry Buffington
-
 Absolutely fabulous!
 -
Medallions for the center of my snowflake ornaments
Pugaboo posted a gallery image in Browse Member Galleries

From the album: First pottery attempts
These are about an inch across and will hang in the center of my snowflake ornaments. The snowflake part is in the kiln as I type and will see how they turned out next week during class. I am pleased with the medallions the colors stayed crisp and bright.© Copyright © Terry Buffington
-

From the album: First pottery attempts
My first four test tubes for glazes. I'm looking for the perfect shade of Pug.© Copyright © Terry Buffington
-

From the album: First pottery attempts
From left to right: my very first clay item made EVER. I call it a starry night lantern. It's really thick and heavy and the snowflakes kind of rain a bit. I plan to try this one again when I am a bit better. The second one is called Fireflies in the evening. Was trying for a grass field in the evening sort of soft and greeny gray with fireflies. I learned a lot doing this one about when to wax parts to make it easier to do. The third one on the far right is butterflies flutterby. Lol I used what I learned on the previous ones to make it a lot less work and to be able to get a lot more detail, it's also one of my first times using paper stencils.© Copyright © Terry Buffington
-

From the album: First pottery attempts
It only took me 2 class rounds to finally finish this. I couldn't decide what to glaze the interior, in the end I went with Tenmoku. I had a few issues on other pieces with the under glaze running so was waiting until I figured that out before glazing the exterior. Figured out the issue was not using Amaco clear over Amaco underglazes. So problem solved piece completed.© Copyright © terry Buffington
-

From the album: First pottery attempts
My first large item. Amazingly enough it's not all warped and even the colors ended up okay. Materials I used Little Loafers, Amaco UG, Amaco zinc free clear. Techniques I tried, sgraffito, doily impression, paper doily stenciling and one of my own Pug dog drawings. I learned a lot doing this tray!© Copyright © Terry Buffington


